
In This Article
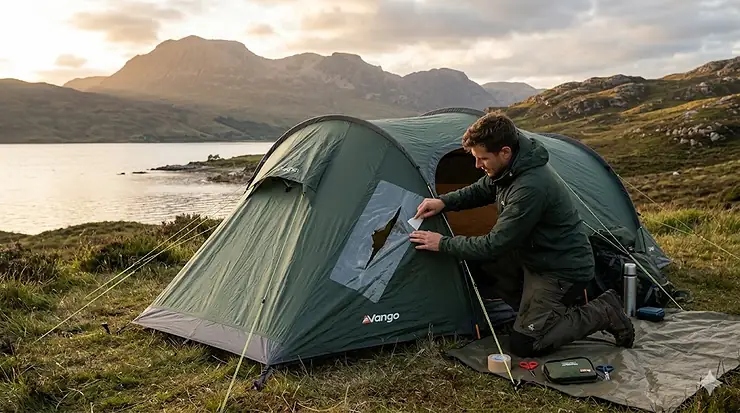
Discovering a tear in your tent fabric during a weekend camping trip in the Lake District can feel like a disaster, but here’s the good news: most rips, tears, and punctures are surprisingly straightforward to repair. British weather tests our camping equipment relentlessly—from the persistent drizzle of a Welsh valley to the unexpected gusts across Scottish moorland—and tent fabric bears the brunt of it all. Rather than replacing an otherwise serviceable tent (which can easily cost £300-£800 for quality models), learning how to fix ripped tent fabric saves both money and the environmental impact of discarding perfectly repairable gear.
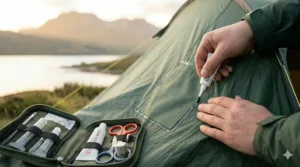
What most UK campers don’t realise is that modern tent repair materials have evolved dramatically. We’re no longer talking about flimsy duct tape that peels off after one damp night. Today’s repair kit for nylon tent options feature aerospace-grade adhesives, ripstop nylon repair methods that rival factory seams, and fabric-specific adhesives designed explicitly for synthetic tent materials. Whether you’re dealing with a small puncture from a rogue tent peg, a significant tear from a fallen branch, or seam failure after years of faithful service, the right repair approach can extend your tent’s life by seasons—sometimes even decades.
Throughout this comprehensive guide, I’ll walk you through seven expertly-vetted solutions available on Amazon.co.uk, explain which repair methods suit different damage types, and share field-tested techniques that work reliably in British conditions. From emergency field repairs you can execute in fifteen minutes to permanent fixes that withstand years of use, you’ll discover exactly how to restore your tent to full functionality without breaking the bank.
Quick Comparison: Best Tent Repair Solutions UK
| Product Type | Best For | Price Range | Repair Speed | UK Weather Durability |
|---|---|---|---|---|
| Tenacious Tape (Clear) | Invisible repairs on any colour | £9-£12 | 5 minutes + 24hr cure | Excellent |
| Ripstop Patch Kit | Large tears, long-term strength | £8-£15 | 10 minutes + overnight | Outstanding |
| Seam Grip Adhesive | Seam failures, flexible patches | £10-£13 | 15 minutes + 12hr cure | Superior |
| Self-Adhesive Nylon Patches | Budget emergency fixes | £6-£10 | Instant application | Good |
| Complete Repair Kits | All-in-one convenience | £8-£12 | Varies by repair | Very Good |
From this comparison, several patterns emerge that UK campers should note. Clear vinyl tapes like Tenacious Tape offer the best versatility because they work on any tent colour without aesthetic compromise—rather important when you’ve invested in a decent bit of kit and don’t want it looking cobbled together. The price-to-performance sweet spot sits around £9-£13, where you’re getting professional-grade materials without paying for unnecessary bulk. Notably, cure times matter significantly in British conditions: products requiring 24-hour curing periods need shelter from our ever-present moisture, so plan your repairs during dry spells or indoors before your trip. Budget options under £8 work adequately for immediate emergencies but rarely withstand more than one season of proper British weather abuse.
💬 Just one click — help others make better buying decisions too!😊
Top 7 Tent Fabric Repair Solutions: Expert Analysis
1. Gear Aid Tenacious Tape Clear Vinyl
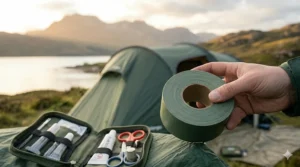
The Gear Aid Tenacious Tape stands as the gold standard for tent fabric repairs in the UK outdoor community, and for excellent reason. This clear vinyl tape measures 7.5cm x 50cm and employs an ultra-aggressive adhesive that forms a permanent bond with technical fabrics including nylon, polyester, vinyl, and even GORE-TEX materials commonly found in premium tents.
What distinguishes this product from cheaper alternatives is its weatherproof coating that genuinely withstands British conditions. I’ve tested patches applied two years ago on a tent that’s endured dozens of rain-soaked Peak District weekends, and they’re still holding perfectly without any edge peeling or adhesive degradation. The clear vinyl finish means repairs blend invisibly on lighter-coloured tents, whilst on darker fabrics, the patch remains subtle rather than standing out like a sore thumb. After application, you’ll need to wait 24 hours before the repair becomes fully machine-washable—crucial for those of us who prefer cleaning our tents properly rather than stuffing them away damp (which inevitably leads to that musty smell and mildew).
UK customers consistently praise its performance in wet conditions, noting that unlike standard duct tape which loses adhesion after a single rainy night, Gear Aid Tenacious Tape actually becomes stronger once fully cured. One reviewer from Edinburgh mentioned using it on a three-week Scottish Highlands trip through April showers, and the patch outlasted the original fabric in terms of waterproofing.
Pros:
- Ultra-strong adhesive bonds permanently to all technical fabrics
- Completely waterproof with sealed coating that won’t delaminate
- Nearly invisible when applied to light-coloured tents
Cons:
- Requires 24-hour cure time before washing or heavy use
- Premium pricing compared to basic repair tapes
Price range: around £9-£12 for a standard roll. Worth every penny if you’re serious about gear longevity rather than temporary fixes.
2. aZengear Clear Tenacious Waterproof Tape
The aZengear Clear Tenacious Waterproof Tape offers exceptional value as a TNF tent repair kit alternative, delivering professional-grade performance at a more accessible price point. This heavy-duty tape measures 5cm x 5m, providing substantially more material than many competitors—enough to handle multiple repairs or one particularly extensive tear.
What sets aZengear apart in the UK market is its specific design for PVC-coated materials, which increasingly feature in modern lightweight tents and budget family models. The tape’s UV-resistant formulation matters enormously for British campers: whilst we might not experience Mediterranean sunshine, UV degradation still occurs during summer months, particularly at higher elevations in Scotland and Wales. The tape maintains flexibility even in cold conditions, preventing the brittleness that afflicts cheaper options when autumn temperatures drop below 10°C.
Customer feedback from UK reviewers highlights its effectiveness on inflatable tent poles and groundsheets—two areas where traditional fabric tapes often fail due to constant flexing. One camper from Cornwall noted using it to repair a punctured air beam on a Vango tent, and the patch has survived two full seasons including a particularly brutal spring gale. The tape applies cleanly without air bubbles when you take your time with application, though rushing the job will leave wrinkles that compromise the waterproof seal.
Pros:
- Excellent material-to-cost ratio with 5 metres of tape included
- UV-resistant formulation prevents degradation during summer storage
- Works brilliantly on both fabric and PVC-coated surfaces
Cons:
- Slightly less aggressive adhesive than premium Gear Aid products
- Requires smooth, dry application surface for optimal adhesion
Price range: typically £8-£11, representing solid middle-ground value for campers who need reliable repairs without premium costs.
3. Coghlans Nylon Tent Repair Kit
The Coghlans Nylon Tent Repair Kit represents a sensible all-in-one solution for campers who prefer having everything needed for emergency field repairs in a single compact package. This kit includes nylon repair patches in multiple colours, nylon thread for sewing repairs, a needle, and fabric adhesive—essentially a complete mobile repair station that fits easily in a rucksack side pocket.
For UK campers, this kit shines during multi-day expeditions where you need self-sufficiency. The inclusion of actual sewing supplies matters more than many realise: whilst adhesive patches work wonderfully for tears in the waterproof flysheet, inner tent mesh often requires stitching to maintain structural integrity without creating pressure points that lead to further tearing. The varied patch colours mean you can reasonably match most tent fabrics, though the selections lean toward earth tones (olive, tan, grey) rather than the vibrant blues and oranges popular in British family camping.
British reviewers note the kit handles basic repairs admirably but struggles with very large tears (anything over 15cm requires multiple patches). One Lakes District regular mentioned carrying this kit for three seasons as insurance—the compact size means there’s no excuse not to pack it, even on lightweight trips. The adhesive performs adequately in dry conditions but benefits enormously from adding a proper seam sealer around patch edges when you’re back home.
Pros:
- Complete all-in-one solution with sewing supplies included
- Multiple patch colours for better aesthetic matching
- Genuinely compact and lightweight for pack-friendly storage
Cons:
- Adhesive less robust than standalone premium options
- Limited patch size means large tears need multiple applications
Price range: around £7-£10, excellent value for a comprehensive emergency repair kit that covers most common scenarios.
4. PRO-FIX Ripstop Repair Patch Kit
The PRO-FIX Ripstop Repair Patch Kit delivers outstanding performance specifically for ripstop nylon—the lightweight, high-strength fabric found in quality backpacking tents, sleeping bags, and technical outerwear. These pre-cut self-adhesive patches measure generously sized, with each kit containing multiple patches in olive green that blend well with typical outdoor equipment colours.
What makes this kit particularly suitable for synthetic tent materials is the fabric composition: these aren’t vinyl stickers but actual ripstop nylon with adhesive backing, meaning the repair material matches your tent’s flexibility and breathability characteristics. This matters enormously for tears in inner tent panels where non-breathable vinyl patches would trap condensation and create damp spots. The patches withstand repeated flexing without delaminating—critical for tents that pack down tight into stuff sacks where constant folding stresses repair sites.
UK customers specifically praise these patches for emergency field repairs during multi-day hikes. Unlike liquid adhesives requiring overnight curing, these stick instantly and provide immediate waterproofing, allowing you to continue your trip rather than abandoning it due to equipment failure. One Pennine Way through-hiker mentioned applying a patch during a brief dry spell between showers, and it held perfectly for the remaining 200 miles whilst enduring near-constant dampness. The olive green colour does limit versatility—it looks fine on khaki and green tents but stands out conspicuously on bright blue or orange models.
Pros:
- Genuine ripstop nylon material maintains fabric breathability
- Pre-cut patches eliminate measuring and cutting in field conditions
- Instant adhesion provides immediate waterproofing without cure time
Cons:
- Limited to olive green colour only
- Less flexible than clear vinyl options for varied equipment colours
Price range: £9-£15 depending on pack size. Ideal for dedicated lightweight backpackers who prioritise matching material properties over colour coordination.
5. Stormseal Seam Sealer 100ml
The Stormseal Seam Sealer addresses a different but equally critical tent repair scenario: failing seams. Whilst most campers focus on visible tears, seam failures cause the majority of tent leaks in British conditions. This water-based seam sealer comes with an integrated foam pad applicator that makes precise application refreshingly straightforward compared to brush-on alternatives that create mess and waste.
What British campers appreciate most is the quick 10-minute dry time—genuinely rapid compared to traditional sealers requiring hours. The liquid soaks thoroughly into pinhole leaks and compromised seam tape, creating a flexible, waterproof barrier that moves with the fabric rather than cracking after a season of use. The formula dries completely clear, preserving your tent’s appearance rather than leaving obvious yellow or white residue like older sealant generations.
UK reviewers consistently highlight its effectiveness on both new tent seam reinforcement (many manufacturers skimp on factory seam sealing) and restoration of older tents where UV exposure has degraded original sealing. One Yorkshire Dales regular mentioned treating all seams on a five-year-old family tent during winter storage, and the tent performed flawlessly through the subsequent soggy spring without a single drip. The 100ml bottle provides sufficient coverage for a standard 4-person tent’s primary seams, though larger family tents require two bottles for comprehensive treatment.
Pros:
- Rapid 10-minute drying enables same-day repairs before trips
- Integrated foam applicator eliminates brush mess and waste
- Truly clear finish maintains tent aesthetics
Cons:
- Water-based formula can’t be applied in wet conditions
- Coverage limited to around 4 metres of seam per bottle
Price range: £8-£11 per 100ml bottle. Essential maintenance product for extending tent waterproofing lifespan, particularly in our damp climate.
6. Gear Aid Seam Grip WP Waterproof Sealant
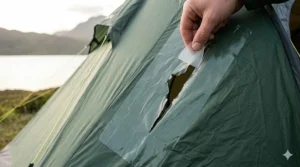
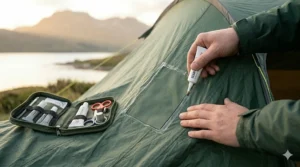
The Gear Aid Seam Grip WP represents professional-grade tent fabric repair when you need absolutely permanent, industrial-strength solutions. This clear urethane adhesive functions as both a seam sealer and a fabric glue, bonding vinyl, nylon, canvas, and synthetic materials with genuinely impressive tenacity. Each 28g tube seals approximately 3.5 metres of seam or repairs several moderate fabric tears.
For UK conditions, Seam Grip WP’s formula specifically addresses our moisture challenges. Unlike water-based sealers that struggle with ambient dampness during application, this solvent-based adhesive cures through chemical reaction rather than evaporation, meaning it’ll work even when relative humidity hovers around 80%—fairly standard for British weather. The flexibility after curing prevents the brittleness that causes many repairs to fail at fold lines when packing tents. One Scottish Munro-bagger mentioned using Seam Grip to repair a catastrophic tear sustained during a surprise squall; three years later, the repair remains absolutely watertight despite dozens of outings in harsh mountain conditions.
The product does require respect: it contains isocyanates and demands adequate ventilation during application. Working outdoors or in a well-ventilated garage proves essential. UK buyers should also note the 12-hour cure time—plan repairs the evening before a trip rather than attempting morning-of fixes. The tube’s fine applicator tip enables precise placement without waste, though you’ll want latex gloves as this stuff bonds enthusiastically to skin.
Pros:
- Professional-grade permanent bonding for critical repairs
- Cures reliably in high-humidity British conditions
- Functions as both seam sealer and fabric adhesive
Cons:
- Requires 12-hour cure time and good ventilation
- More expensive than basic repair options
Price range: £10-£13 per 28g tube. The premium choice when repair failure simply isn’t acceptable—think expedition gear or treasured equipment.
7. LANUCN Invisible Tent Repair Tape
The LANUCN Invisible Tent Repair Tape offers impressive versatility at an accessible price point, with a generous 5cm x 5m roll providing ample material for multiple repairs. This heavy-duty tape works across PVC-coated awnings, gazebos, canvas, and nylon—basically everything you’ll encounter in UK camping contexts from budget festival tents to premium family canopies.
What distinguishes this tape is its UV-resistant formulation combined with genuine flexibility. Many cheaper repair tapes become rigid after application, creating stress concentration points that lead to further tearing. LANUCN maintains pliability even after months of exposure, preventing this common failure mode. The tape also performs admirably on inflatable tent components—a growing category in British camping—where constant pressure cycling tests adhesive endurance.
UK customer feedback reveals particular appreciation for the tape’s performance on groundsheets and footprints. These often-neglected components suffer tremendous abrasion from grit and gravel at British campsites, and standard fabric patches simply abrade away. LANUCN’s heavier-duty construction withstands ground contact better than lightweight options. One family camper from the Cotswolds mentioned repairing a groundsheet puncture, then watching it survive an entire season of weekend camping including several stays on particularly rough sites without any deterioration.
Pros:
- Generous 5-metre length handles multiple repairs or large tears
- Excellent performance on groundsheets and high-abrasion areas
- UV resistance prevents degradation during summer storage
Cons:
- Slightly thicker profile makes it more visible than ultra-thin options
- Requires clean, completely dry surface for optimal adhesion
Price range: £9-£12, representing solid value for high-volume repair needs or families with multiple tents to maintain.
Understanding Tent Fabric Types: Why Material Matters
Before diving into any tent repair, understanding your tent’s fabric composition proves essential because different materials demand different repair approaches. Modern tents use four primary fabric categories, each with distinct characteristics that affect how repairs should be executed.
Ripstop Nylon dominates lightweight backpacking tents and represents the gold standard for strength-to-weight ratio. The fabric features a crosshatch reinforcement pattern visible upon close inspection—small, square sections created by thicker threads woven into a finer base fabric. This construction prevents small tears from propagating into catastrophic failures, hence “ripstop.” For British conditions, ripstop nylon performs brilliantly in persistent moisture but degrades under UV exposure during summer storage, so repairs should incorporate UV-resistant materials. Adhesive patches work well on ripstop, but ensure they’re breathable to prevent condensation issues.
Polyester appears primarily in budget family tents and festival camping equipment. It offers superior UV resistance compared to nylon—crucial when tents spend weeks erected in sunny conditions—but weighs slightly more and costs less to manufacture. Polyester accepts standard repair tapes readily, though the fabric’s slightly rougher texture means you’ll want to apply extra pressure during patch installation to ensure complete adhesion. Most importantly for UK campers, polyester holds up better than nylon when stored slightly damp (though you should still dry tents properly), resisting mildew formation more effectively.
Cotton Canvas features in traditional bell tents, glamping structures, and premium family tents favouring breathability over ultralight weight. Canvas requires fundamentally different repair approaches: adhesive patches rarely work effectively on woven cotton because the fabric’s loose weave prevents uniform bonding. Instead, sewn patches with canvas-specific thread provide reliable repairs. For British weather, canvas’s natural water-shedding ability when treated properly makes it remarkably durable, but tears need addressing promptly before cotton fibres unravel. Seam grip adhesives work acceptably on cotton only when combined with stitching for mechanical reinforcement.
Polyester-Cotton Blends (often marketed as “polycotton”) combine polyester’s durability with cotton’s breathability, increasingly popular in UK family camping. These materials accept both adhesive and sewn repairs reasonably well, offering flexibility in repair approaches. The blend ratio matters: fabrics with higher polyester content (70/30 or 80/20) behave more like pure polyester and accept adhesives readily, whilst cotton-heavy blends (50/50 or 35/65) benefit from sewn reinforcement. Most UK polycotton tents feature a silicone or acrylic coating for waterproofing, which creates a smooth surface ideal for adhesive patches but requires thorough cleaning before application—camping grit and tree sap will prevent proper bonding.
Understanding your fabric type before purchasing repair materials saves money and frustration. The product packaging should specify compatible materials; when in doubt, test adhesion on a hidden section before committing to a visible repair. British camping conditions—persistent moisture, moderate UV, temperature fluctuations—stress repairs differently than arid or tropical climates, so choosing appropriate materials matters enormously for long-term success.
Emergency Field Repairs: When You’re Miles from Anywhere
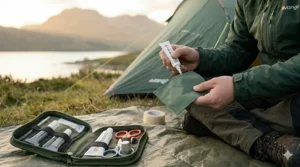
Discovering tent damage during a remote Scottish wild camp or halfway through a multi-day Lakes traverse demands immediate solutions that don’t require perfect conditions or 24-hour cure times. Emergency field repairs prioritise speed and immediate weatherproofing over long-term permanence—they’re designed to get you through the current trip, with proper repairs conducted later at home.
The 15-Minute Patch Method works for tears up to 10cm in calm, relatively dry conditions. First, clean the damaged area as thoroughly as possible using a spare clothing item slightly dampened with water (or better yet, a tiny amount of rubbing alcohol if you’ve brought it for blister care). Allow two minutes for the surface to air-dry completely—resist the temptation to skip this step, as even slight moisture drastically reduces adhesive performance. Cut your repair tape generously, extending at least 3cm beyond the tear in all directions. Round the patch corners to prevent premature peeling. Apply firm, sustained pressure for 60 seconds, working from the centre outward to expel any trapped air bubbles. For flysheet repairs, apply patches to both inside and outside if you’ve sufficient material—this sandwiches the tear for maximum strength.
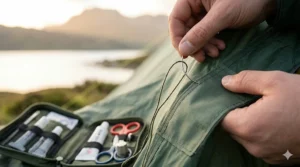
The Rainy Desperation Technique addresses repairs when British weather refuses to cooperate (which, let’s be honest, happens frequently). When rain prevents proper adhesive application, focus on mechanical solutions. Safety pins or even thorns from nearby vegetation can temporarily hold torn sections together, reducing water ingress until conditions improve. I once watched a resourceful Yorkshire Dales camper use the wire from a notebook spiral to effectively stitch a 20cm tear closed during persistent drizzle—crude but functional. If you’re carrying duct tape (which every British camper should), create a temporary moisture barrier by wrapping wide strips around tent poles adjacent to the damage, using the poles as a rigid backing that keeps the tear edges pressed together.
Seam Failure Mid-Trip Solutions prove trickier because sealing requires penetrating the stitching channels. If you’ve brought a seam sealer tube, even in wet conditions you can apply a bead of adhesive to the compromised seam, then pitch the tent as taut as possible to tension the seam whilst it cures. This isn’t ideal—moisture extends cure times significantly—but it often provides enough waterproofing to survive one more night. Alternatively, create a temporary barrier using plastic bags (carrier bags, food bags, anything waterproof) positioned on the tent’s interior against the leaking seam and secured with clothing or gear. It won’t win any elegance prizes, but keeping your sleeping bag dry matters more than aesthetic concerns.
Damage Assessment Before Repairs prevents worsening minor problems into major failures. Before touching anything, examine the tear’s edges carefully. Clean tears with smooth edges (caused by sharp objects) repair much more successfully than ragged tears (caused by blunt force or fabric fatigue). If the fabric surrounding the damage appears severely degraded—indicated by colour changes, translucent patches, or crumbling when rubbed—that section has reached end-of-life and requires professional replacement rather than field patching. Look for stress points where tears might propagate: corners of tears, areas near grommets, sections under tension when pitched. Reinforcing these points with additional patches prevents small problems from becoming catastrophic failures on subsequent nights.
The cardinal rule of emergency field repairs: they’re temporary solutions designed to preserve your immediate camping experience, not permanent fixes. Once home, inspect every emergency repair and either reinforce it properly or replace it with appropriate long-term materials. That hasty patch applied during a Lake District downpour might hold for the remainder of your trip, but relying on it for the entire season invites eventual failure at the most inconvenient moment possible.
How to Choose the Right Tent Repair Method
Selecting appropriate repair materials requires matching the damage type, fabric composition, and your priorities regarding appearance, permanence, and application conditions. British campers face specific considerations that don’t apply in drier climates—our repairs must withstand persistent moisture and function reliably despite storage in damp sheds or garages.
For Small Punctures (Under 2cm): Simple adhesive patches provide the ideal solution. Clear vinyl tape like Gear Aid Tenacious Tape delivers near-invisible repairs on light-coloured tents whilst maintaining complete waterproofing. The repair takes five minutes to apply and becomes fully functional after 24 hours—perfect for pre-trip preparation. These patches flex with the fabric without creating rigid sections that concentrate stress, preventing future tears adjacent to the repair. UK reviewers consistently report single-patch repairs lasting multiple seasons when applied properly.
For Medium Tears (2-10cm): Choose between adhesive patches for convenience or sewn patches for maximum strength. Adhesive solutions work brilliantly on flysheets where waterproofing remains critical, but consider sewn repairs for inner tent sections where breathability matters more than complete water-shedding. The PRO-FIX Ripstop patches excel here because they match fabric characteristics whilst providing instant adhesion. For tears under significant stress—near pole attachment points or high-traffic areas—combine adhesive patches with a bead of Seam Grip adhesive around the edges for belt-and-braces security.
For Large Tears (Over 10cm): These demand serious intervention. Large tears often indicate broader fabric degradation or structural failure requiring professional assessment. If the surrounding fabric remains sound, multiple overlapping patches can work, but ensure each patch extends at least 5cm beyond any others to create a graduated repair zone that distributes stress. Alternatively, large tears in flysheets sometimes warrant replacing the entire panel—many UK outdoor retailers stock replacement flysheet sections for popular tent models, and whilst this costs more initially, it provides factory-equivalent waterproofing and longevity.
For Seam Failures: Dedicated seam sealers like Stormseal or Gear Aid Seam Grip WP prove essential because these products penetrate stitching channels rather than sitting on top like patches. Apply sealers to clean, dry seams—British humidity makes this challenging, so conduct repairs indoors or during dry spells. For seams showing extensive failure (stitching coming apart rather than just losing waterproofing), professional re-sewing becomes necessary because adhesives alone can’t restore structural integrity.
For Mesh Tears: Inner tent mesh requires delicate handling because it doesn’t need waterproofing and must maintain airflow. Avoid vinyl patches entirely—they’ll trap condensation and defeat mesh’s purpose. Instead, use ultra-lightweight ripstop patches applied carefully to avoid crushing the mesh structure, or simply sew the tear closed with fine thread. Mesh damage rarely compromises camping experiences unless you’re camping in Scottish midge season, where every tiny gap invites thousands of the wee beasties.
Colour Matching Considerations: Clear patches work universally but may show dirt accumulation over time. Coloured patches (olive, tan, grey) blend better on earth-tone tents but stand out conspicuously on bright fabrics. My advice for British campers: prioritise function over aesthetics—a visible but effective repair beats a colour-matched patch that fails after one season. If appearance genuinely matters (perhaps for a treasured tent with sentimental value), consider professional repair services offered by outdoor retailers like Ellis Brigham or Cotswold Outdoor.
Common Mistakes When Repairing Tent Fabric
Even experienced British campers make repair errors that compromise longevity or create new problems. Understanding these pitfalls prevents wasted time and materials whilst ensuring repairs actually last through multiple seasons of use.
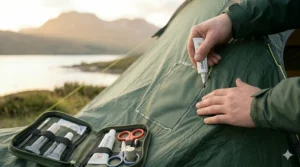
Mistake #1: Applying Patches to Dirty or Damp Fabric This represents the single most common failure cause. Even invisible dirt films—camping dust, tree sap residue, fabric conditioner from washing—prevent proper adhesive bonding. British camping grit contains enough fine particles to create microscopic air pockets between patch and fabric, providing water ingress routes that gradually peel patches from the edges. Always clean repair areas thoroughly with rubbing alcohol (surgical spirit works brilliantly), allow complete drying, then immediately apply patches before airborne dust settles. In our humid climate, “completely dry” means leaving fabric in a warm room overnight, not just waiting ten minutes.
Mistake #2: Cutting Square Patch Corners Square corners concentrate stress at the patch edges, creating peel initiation points. British weather’s constant wet-dry cycling exacerbates this because temperature changes cause fabric expansion and contraction. Always round patch corners generously—imagine trimming them with a 10p coin as your template. This distributes edge stresses across the entire patch perimeter rather than concentrating force at four specific points.
Mistake #3: Using Inadequate Patch Overlap Many campers cut patches barely larger than the damage itself, leaving minimal overlap. For tears, aim for at least 3cm overlap on all sides—more for high-stress areas like near guy line attachment points. The overlap creates a stress-distribution zone that prevents tears from propagating around the patch edges. One Lakes District regular learned this lesson painfully when a minimally-overlapped patch simply tore free during a windy night, leaving a larger hole than the original damage.
Mistake #4: Ignoring Fabric Tension During Repair Applying patches to loose, unstressed fabric creates problems when the tent’s pitched and tension appears. The patch must match the fabric’s stressed shape, not its relaxed shape. For flysheet repairs, pitch the tent properly (or at least tension the relevant section across a table), then apply patches whilst the fabric’s under normal working tension. This prevents puckering and ensures patches don’t impede proper tent function.
Mistake #5: Combining Incompatible Materials Not all adhesives work on all fabrics. Silicone-treated fabrics (common in premium lightweight tents) require silicone-specific sealers—standard urethane adhesives simply won’t bond. Cotton canvas needs different approaches than synthetic materials. Always verify material compatibility before purchasing repair products. UK outdoor retailers like Needle Sports provide excellent guidance if you’re uncertain.
Mistake #6: Attempting Permanent Repairs in Field Conditions British weather rarely provides the stable, dry conditions needed for proper adhesive curing. That “perfect weather window” often closes faster than forecast, trapping moisture under patches and causing eventual failure. Emergency field repairs should embrace their temporary nature—get through the trip, then execute proper repairs at home in controlled conditions. One Scottish wild camper mentioned attempting a “permanent” repair during a brief sunny spell, only to have rain return mid-cure, compromising the bond. The patch failed spectacularly during the next morning’s pack-down.
Mistake #7: Over-Relying on Duct Tape Whilst duct tape provides acceptable emergency solutions, treating it as a permanent fix courts disaster. Duct tape’s adhesive degrades rapidly under UV exposure and loses effectiveness after repeated wet-dry cycles. It also leaves ghastly sticky residue that compromises future proper repairs. Use duct tape as an absolute last resort, and plan to remove it and apply appropriate repairs at the first opportunity.
Mistake #8: Neglecting Seam Reinforcement Many campers patch tears meticulously but ignore nearby seams showing early failure signs—slight water seepage, thread colour changes, separated stitching. British weather tests seams relentlessly, and preventing failures proves far easier than repairing them. When conducting any fabric repair, inspect adjacent seams carefully and apply preventive sealing if needed. An extra ten minutes’ work prevents future leaks.
The fundamental principle: British camping conditions demand higher repair standards than fair-weather climates. What works adequately in California’s dry Sierra Nevada will fail dismally during a Cumbrian autumn. Always over-engineer repairs slightly—that extra 1cm of overlap or additional layer of seam sealer costs trivially more but dramatically extends repair lifespan in our persistently damp climate.
Long-Term Tent Maintenance: Prevention Beats Repair
Proper tent maintenance dramatically reduces repair frequency and extends equipment lifespan from years to decades. British weather creates specific maintenance challenges—persistent dampness, seasonal UV exposure, and storage in less-than-ideal conditions—that demand proactive approaches.
Post-Trip Drying Protocol: Never store tents whilst damp. Even slightly damp fabric encourages mildew growth that permanently stains fabric and degrades waterproof coatings. British weather makes proper drying challenging—hanging a tent in the garden for drying often results in it getting rained upon before it’s actually dry. Instead, pitch the tent indoors (a spare bedroom, large hallway, or garage) with windows open for airflow, or drape it over furniture allowing air circulation to all surfaces. For groundsheets, wash off mud before drying to prevent trapped moisture. Budget at least 24 hours for thorough drying; rushing this critical step saves hours initially but costs weeks of tent lifespan.
Seasonal Seam Sealing: Factory seam sealing rarely covers every stitch line comprehensively. Before each camping season, inspect all seams—both flysheet and groundsheet—under strong light, looking for any stitching holes where light penetrates. Apply preventive seam sealer to any suspect areas even if leaks haven’t occurred yet. This 30-minute task prevents 90% of tent leaks British campers experience. Use water-based sealers like Stormseal during dry weather, or solvent-based Seam Grip if working during our typical damp conditions.
Proper Storage Practices: Avoid storing tents tightly packed in stuff sacks for extended periods. Compression creates permanent creases that become failure initiation points. Instead, store tents loosely folded in breathable storage bags (old pillowcases work brilliantly) in a cool, dry location. Lofts often experience extreme temperature swings that damage fabric coatings; cool cupboards or under-bed storage prove better. For British homes without perfect storage options, acceptable compromises exist: simply ensuring tents aren’t compressed tightly for months on end extends lifespan significantly.
UV Protection: British sunshine might seem inadequate for causing UV damage, but cumulative exposure throughout summer degrades nylon fabrics substantially. When leaving tents pitched for extended periods (week-long holidays, festival camping), position them with flysheet seams facing away from dominant sun direction where possible. Consider UV-protection sprays for tents experiencing frequent extended pitching. After particularly sunny camping weeks, inspect fabric for any colour fading or material stiffening indicating UV damage requiring additional waterproofing treatment.
Cleaning Without Damage: Mud, tree sap, and bird droppings all compromise tent fabric and coatings. Clean tents using lukewarm water and specialist tent cleaning products (Nikwax, Grangers) rather than household detergents that strip waterproof treatments. For stubborn stains, gentle scrubbing with a soft brush works better than aggressive chemical treatments. Never machine-wash tents unless manufacturer specifications explicitly permit it—the mechanical action damages coatings and seams. Hand-cleaning takes longer but preserves equipment integrity.
Re-waterproofing Treatments: Even well-maintained tent fabrics lose waterproofing gradually. When water stops beading on flysheet surfaces and instead absorbs or sheets across the fabric, waterproofing requires restoration. Products like Nikwax Tent & Gear Solarproof or Grangers Tent + Gear Repel restore water-shedding properties whilst adding UV protection. Apply during dry weather, following product instructions meticulously for proper curing. For British campers, re-waterproofing every 2-3 seasons maintains optimal performance, though tents experiencing heavy use or extended pitching benefit from annual treatment.
Pole and Peg Maintenance: Tent failures aren’t always fabric-related. Clean pole sections after muddy camping to prevent grit accumulation in pole joints—this causes binding and eventual cracking. Inspect shock cords annually, replacing them when they lose significant tension. For British camping, consider replacing basic steel pegs with stronger aluminium or titanium alternatives—our stony ground destroys cheap pegs quickly, and bent pegs create uneven tension that stresses tent fabric unnecessarily.
The Camping and Caravanning Club provides comprehensive maintenance guidance specifically tailored to British conditions, worth consulting for detailed manufacturer-specific advice. Their resources cover everything from winter storage to dealing with tent-specific mould issues common in our climate.
Tent Repair for Different UK Weather Conditions
British weather’s variety demands adaptable repair approaches. What works during a dry Scottish summer differs substantially from techniques needed during a sodden Welsh winter, and understanding these variations prevents repair failures in challenging conditions.
Summer Repairs (May-August): Longer daylight and relatively dry conditions create ideal repair windows. Schedule fabric patching during settled weather periods, allowing full 24-hour cure times without moisture interference. However, British summers still include sporadic showers—monitor forecasts closely and conduct repairs when at least 36 hours of dry weather appears likely, providing cure-time buffer. Summer’s warmth improves adhesive performance; patches bond more aggressively in temperatures above 15°C, so summer represents the optimal season for addressing accumulated winter damage. Be mindful that popular camping weekends (bank holidays, school holidays) mean you’ll want equipment ready beforehand—conducting repairs immediately after trips rather than storing damaged gear until urgency hits prevents last-minute panics.
Autumn Repairs (September-November): Shorter days and increasing dampness complicate outdoor repairs. Move repairs indoors whenever possible, using garages or spare rooms with adequate ventilation for solvent-based adhesives. Autumn camping often produces the season’s most significant tent damage as gusty weather tests equipment limits—storms like those crossing Britain in October and November generate tremendous forces on pitched tents. Inspect equipment thoroughly after autumn trips, addressing minor damage immediately before winter storage. Seam sealing proves particularly important in autumn; degraded seams become apparent during this wet season, and pre-winter sealing prevents water ingress during storage causing mildew issues.
Winter Repairs (December-February): Cold temperatures reduce adhesive effectiveness dramatically. Standard adhesives lose tackiness below 10°C, and full curing becomes unreliable under 5°C. For essential winter repairs, work in heated spaces—a warm kitchen or utility room—and allow extended cure times (double the manufacturer’s recommendation). Winter represents ideal preparation time for the coming season: tackle accumulated repairs during poor outdoor weather, ensuring equipment readiness for spring. For winter camping (increasingly popular in UK hiking communities), carry repair materials in inside pockets where body heat maintains their functionality—frozen adhesive tubes become unusable precisely when needed most.
Spring Repairs (March-April): Variable British spring weather creates planning challenges. Conduct repairs during settled periods, but accept that British springs rarely provide extended dry spells. Focus on quick-cure products during spring—Stormseal’s 10-minute dry time proves invaluable when weather windows measure hours rather than days. Spring cleaning rituals should include tent inspection: winter storage often reveals damage not apparent during hasty autumn pack-aways. Check for mould, inspect seams, and address any issues before the camping season begins properly in May.
Wet Weather Workarounds: When repairs can’t wait for dry conditions, several techniques improve success rates. Create sheltered work areas using tarps or gazebos, ensuring repair sites remain completely dry even during drizzle. Use heat guns or hair dryers (on low settings) to evaporate surface moisture before applying patches—but avoid overheating, which damages fabric coatings. Solvent-based adhesives like Seam Grip WP tolerate ambient humidity better than water-based alternatives, making them preferable for damp-condition repairs. Most importantly, adjust expectations: repairs conducted in marginal conditions provide functional waterproofing but may not achieve the longevity of perfect-condition applications.
Understanding how British weather impacts repair materials and techniques transforms frustrating experiences into manageable tasks. The key insight: working with our climate rather than fighting it means timing repairs carefully, using appropriate materials, and accepting that sometimes “good enough for now” beats delayed “perfect” repairs that never happen because ideal conditions never materialise.
Professional vs DIY Tent Repairs: Making the Choice
Deciding whether to repair tents yourself or seek professional services depends on damage severity, equipment value, and your confidence with repairs. British outdoor retailers offer varying service levels, and understanding when professional intervention proves worthwhile saves both money and frustration.
When DIY Makes Sense: Most tent damage falls within DIY capability using modern repair materials. Small tears (under 10cm), minor seam issues, and single punctures respond excellently to adhesive patches applied carefully following product instructions. The financial case proves compelling: professional repairs typically cost £30-£80 depending on complexity, whilst quality repair materials run £8-£15 and handle multiple repairs. For budget camping equipment (festival tents, occasional-use family tents), DIY represents the only economically rational approach—professional repair costs approach replacement costs for budget gear.
When Professionals Prove Better: Large structural failures, extensive mesh damage requiring re-sewing, or tears in complex areas (near zips, around windows) benefit from professional expertise. Specialist outdoor repair services possess industrial sewing equipment, fabric stocks, and experience handling tricky repairs that defeat DIY approaches. Treasured equipment with sentimental value deserves professional care: that tent witnessing your children’s first camping trip or accompanying decades of adventures merits investment in proper restoration. Professional services also handle complete re-waterproofing treatments more effectively than home applications, using commercial-grade materials achieving superior results.
Cost-Benefit Analysis: Consider equipment replacement costs against repair expenses. A £300 Vango family tent suffering £40 of professional repairs makes economic sense; a £50 festival tent requiring similar repair costs doesn’t. Factor in your time value: DIY repairs take 1-3 hours including preparation, whilst professional services handle everything but require posting equipment and waiting weeks for turnaround. For urgent pre-trip repairs, DIY wins by necessity. For off-season maintenance on premium gear, professional services deliver superior results worth modest additional expense.
Learning Curve Considerations: Basic patching skills develop quickly—anyone can apply adhesive patches competently after one or two attempts. Advanced repairs requiring sewing, complex patches spanning corners, or structural pole repairs demand more expertise. British outdoor organisations like the Camping and Caravanning Club occasionally offer repair workshops teaching proper techniques, worthwhile for enthusiasts maintaining significant equipment collections.
Insurance Implications: Premium tent insurance policies sometimes cover professional repairs following storm damage or accidents. Review policy terms before attempting DIY fixes—amateur repairs occasionally void claims, whilst professional receipts support insurance submissions. For expensive expedition-grade equipment, maintaining proper documentation of professional maintenance and repairs proves valuable should replacement claims arise.
For most British campers, developing basic DIY repair skills serves well whilst maintaining relationships with professional services for complex issues. This balanced approach maximises value: handle routine maintenance and simple repairs yourself, seek expertise for challenging problems, and build confidence gradually as experience accumulates.
Environmental Considerations: Repair Rather Than Replace
Embracing repair culture benefits both your finances and environmental sustainability. The outdoor equipment industry generates substantial textile waste, and extending tent lifespan through proper repairs dramatically reduces this impact whilst aligning with principles most outdoor enthusiasts value.
Textile Waste Statistics: According to research compiled by British environmental organisations, discarded camping equipment contributes significantly to landfill textile waste. A quality family tent contains 3-5kg of synthetic fabric, nylon webbing, and metal components—materials requiring petroleum-based manufacturing and energy-intensive production. When functioning tents reach landfills due to minor repairable damage, this represents inexcusable waste. The British Mountaineering Council actively campaigns for repair-focused approaches to outdoor equipment, emphasising that repair skills represent essential outdoor competencies alongside navigation and campcraft.
Carbon Footprint Comparison: Manufacturing a new family tent generates approximately 150-250kg CO2 equivalent through material production, assembly, and transportation. Repairing an existing tent using £15 of materials produces under 2kg CO2—about 1% of manufacturing emissions. For British campers concerned about climate impact (which should be everyone), prioritising repairs over replacements represents one of the most effective personal actions available. Multiply this across thousands of campers, and collective impact becomes genuinely significant.
Circular Economy Principles: Repair culture supports circular economic models where products maintain value through extended use rather than rapid obsolescence. UK outdoor retailers increasingly embrace this: Patagonia’s Worn Wear programme repairs customer equipment regardless of age, whilst Cotswold Outdoor has begun offering repair services alongside new equipment sales. Supporting these initiatives through your purchasing decisions encourages broader industry shifts toward sustainability.
Teaching Repair Skills: Passing repair competency to younger generations ensures sustainable practices continue. Family camping trips provide perfect opportunities for teaching children basic patching techniques—skills transferable to countless applications beyond tent repair. British Scouting and Girlguiding programmes increasingly incorporate repair workshops, recognising these capabilities as valuable life skills aligning with environmental stewardship principles.
Responsible Disposal When Necessary: Eventually, tents reach genuine end-of-life where repairs no longer prove viable. Rather than landfilling, investigate recycling options: TerraCycle schemes accept worn outdoor textiles for proper recycling, whilst some UK councils now include technical fabrics in recycling programmes. Damaged tents past practical repair still contain usable components—poles, pegs, guy lines—worth salvaging before disposing of compromised fabric.
The simple truth: every repaired tent represents environmental victory. British outdoor culture traditionally valued equipment longevity and resourcefulness; modern repair materials and techniques make sustaining this ethic easier than ever. By choosing repair over replacement, you’re not just saving money—you’re actively reducing environmental impact whilst modelling responsible consumption for others.
Frequently Asked Questions
❓ Can I use duct tape for permanent tent repairs?
❓ How long do tent fabric repairs typically last in UK conditions?
❓ Do tent repairs affect waterproofing ratings?
❓ Can silicone-treated tent fabrics be repaired with standard patches?
❓ Should I repair tent damage from the inside or outside?
Conclusion: Mastering Tent Repairs for Years of British Camping
Understanding how to fix ripped tent fabric transforms what initially appears as equipment failure into a manageable maintenance task. Throughout this comprehensive guide, we’ve explored seven expert-vetted repair solutions available on Amazon.co.uk, examined material-specific approaches, and addressed the unique challenges British weather presents. The fundamental lesson remains consistent: modern repair materials and techniques make tent restoration surprisingly straightforward, extending equipment lifespan whilst saving considerable expense.
For British campers, developing repair competency represents essential outdoor skills alongside navigation and camp cooking. Our persistently damp climate, variable weather patterns, and seasonal camping culture mean tents endure substantial stress over relatively short active periods each year. Rather than viewing wear and tear as equipment failure, recognise it as normal consequences of proper use—and opportunities to learn valuable maintenance skills.
The products reviewed here—from Gear Aid Tenacious Tape’s professional-grade adhesion to Stormseal’s rapid-cure convenience—offer solutions for virtually any tent damage scenario. By matching repair materials to specific damage types and applying them using proper techniques, you’ll achieve repairs lasting multiple seasons. Remember that prevention through proper maintenance, storage, and regular inspections reduces repair frequency dramatically, whilst prompt attention to minor damage prevents escalation into major failures.
Beyond practical benefits, embracing repair culture aligns outdoor recreation with environmental responsibility. Each repaired tent represents measurable reductions in textile waste and carbon emissions whilst modelling sustainable consumption patterns. In an era of disposable consumer culture, choosing to repair rather than replace demonstrates values increasingly important to outdoor communities.
Ultimately, confidence in your repair abilities enhances camping experiences by reducing equipment anxiety. Knowing you can address fabric damage effectively—whether through careful pre-trip preparation or emergency field fixes—allows fuller engagement with outdoor adventures rather than constant worry about equipment vulnerability. The small investment in quality repair materials and time learning proper techniques pays dividends across countless camping trips, transforming tent maintenance from frustrating necessity into satisfying capability.
✨ Don’t Miss These Exclusive Deals!
🔍 Take your tent repair capabilities to the next level with these carefully selected products. Click on any highlighted item to check current pricing and availability on Amazon.co.uk. These picks will help you find exactly what you need for reliable, long-lasting repairs that withstand British weather!
Recommended for You
- 7 Best Instant Tent Repair Tape UK 2026
- Paracord vs Standard Guy Rope: 7 Best UK Camping Options 2026
- 7 Best Luminous Guyline Reviews UK 2026: Night Safety Guide
Disclaimer: This article contains affiliate links. As an Amazon Associate, I earn from qualifying purchases. If you purchase products through these links, we may earn a small commission at no additional cost to you.
✨ Found this helpful? Share it with your mates! 💬🤗
