
In This Article
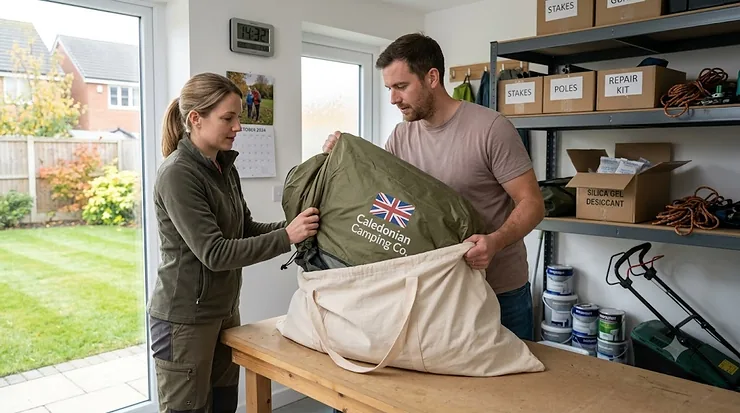
You know that sinking feeling. You unzip the bag after months in the loft and you’re hit with a smell like a wet dog that’s been locked in a cupboard since March. That’s the smell of a tent that wasn’t stored properly, and it’s almost always avoidable. Knowing how to store tent long term properly is less about fancy gadgets and more about understanding three enemies: moisture, heat, and pressure. Get those three under control and a decent tent can easily outlive several camping seasons, sometimes a decade or more, without a single spore of mould touching the flysheet.
This guide is built for a British climate, which is to say a genuinely difficult one for canvas and nylon alike — damp autumns, mild-but-humid sheds, and lofts that swing from freezing to sweltering depending on the season. We’ll walk through seven real, currently available products that solve specific parts of the storage puzzle, then get into the analysis: what actually works, what’s a waste of money, and how to build a routine that takes ten minutes but saves you the cost of a replacement tent. Whether you’re storing a two-man backpacking tent between festivals or a family-sized dome that only comes out for a fortnight each August, the fundamentals below apply. Let’s get into it.
Quick Comparison: Tent Storage Essentials at a Glance
Before diving into the full breakdown, here’s a snapshot of where each product fits into your storage plan, from repair to reproofing to the box it all goes in.
| Product | Category | Price Range | Best For |
|---|---|---|---|
| GEAR AID Tenacious Tape | Pre-storage repair | Under £15 | Sealing small tears before they trap moisture |
| PREMIDRY Silica Gel Sachets | Moisture absorption | Under £15 | Budget-friendly damp control inside bags/boxes |
| Pro Breeze Cordless Rechargeable Mini Dehumidifier | Active moisture control | £15–£25 | Sheds, cupboards and unheated storage spaces |
| Wham Crystal 45L Storage Boxes (Set of 5) | Rigid storage | £30–£45 | Long-term, rodent- and dust-proof storage |
| Fabsil Universal Protector (2.5L) | Reproofing | £20–£35 | Restoring water repellency before storage |
| Wet & Forget Mould, Lichen & Algae Remover (2L) | Mould treatment | £15–£25 | Removing green algae and mould before packing away |
| Spacesaver Jumbo Vacuum Storage Bags (6-Pack) | Compression storage | £20–£35 | Saving space in lofts and small flats |
Looking at the table, a pattern emerges quickly: no single product does the whole job. What most buyers overlook is that tent storage is a system, not a purchase — you need something to clean and reproof the fabric, something to control humidity inside the storage container, and something rigid or compressible to keep it all protected from dust, pests and crushing. Skimping on any one stage tends to undo the money spent on the others, which is really the whole argument for treating this as a routine rather than a single trip to the shed.
💬 Just one click — help others make better buying decisions too!😊
Top 7 Tent Storage Products: Expert Analysis
1. GEAR AID Tenacious Tape — invisible repairs that stop damp getting a foothold
Before your tent goes anywhere near a storage box, it’s worth checking the fabric for pinholes, snagged mesh or a lifted seam, because those tiny gaps are exactly where condensation collects and mildew gets its first foothold over winter. Tenacious Tape is a peel-and-stick nylon or vinyl repair tape with an aggressive adhesive that bonds to technical fabrics — nylon, ripstop, vinyl — without needing heat, sewing or a trip to a repair shop. Coverage-wise, a single roll (around 1.5 x 60 inches for the clear vinyl version, or 3 x 20 inches for the nylon rolls) handles several small repairs, and it’s genuinely washable once cured for 24 hours.
Based on the spec comparison with sew-in patch kits, the appeal here is speed: this is a five-minute fix rather than a half-hour one, which matters when you’re trying to get a tent dry and packed away before the next downpour. It’s best suited to weekend campers and festival-goers who pick up small tears through pegging mishaps or overenthusiastic packing, rather than anyone needing a structural seam repair — for that, a proper seam sealant is the better tool. Reviewers consistently report that the bond holds for years on synthetic fabrics but performs poorly on cotton canvas, so bell tent owners should look elsewhere for repairs.
Pros:
- ✅ No sewing, heat or glue mess required
- ✅ Washable and weatherproof once cured
- ✅ Works on nylon, ripstop, vinyl and mesh
Cons:
- ❌ Not recommended for cotton or canvas tents
- ❌ Small roll size means bigger tears need multiple applications
At under £15, this is one of the cheapest items in your entire storage kit, and the value case is straightforward: a £3m ripstop tent saved from a growing tear for the price of a coffee.
2. PREMIDRY 5g Silica Gel Sachets (Pack of 50) — the quiet workhorse of moisture control storage
Silica gel gets overlooked because it looks unremarkable — small paper sachets that seem more suited to a shoebox than serious tent care — but the science behind it is exactly what long-term storage needs. Each 5g sachet absorbs ambient moisture from the air inside a sealed or semi-sealed space, and the colour-indicating beads inside turn from orange to green as they saturate, giving you a visual cue for when to swap them out or recharge them in a low oven.
What most buyers overlook about this kind of moisture control storage is that silica gel doesn’t need to dry your entire garage; it only needs to manage the small pocket of air trapped inside your tent bag or storage box, which is a far more achievable job. For a typical 2-4 person tent bag, five to ten sachets tucked into the folds and pole bag is a sensible starting point, with more for a bell tent or larger canvas structure. Reviewers on this style of sachet consistently note that the packs are reusable if you’re willing to microwave or oven-dry them periodically, which stretches the value considerably further than a single-use pack suggests.
Pros:
- ✅ Reusable and rechargeable via oven or microwave
- ✅ Colour-changing beads show saturation at a glance
- ✅ Small enough to tuck into pole bags and pockets
Cons:
- ❌ Needs replacing/recharging regularly in very damp sheds
- ❌ Only effective in a semi-enclosed space, not open air
Priced under £15 for fifty sachets, this is arguably the best pound-for-pound moisture insurance on this list, and pairing it with a rigid storage box (more on that below) multiplies its effectiveness because the air pocket stays smaller and more controllable.
3. Pro Breeze Cordless Rechargeable Mini Dehumidifier — active defence for sheds, cupboards and unheated spaces
Where silica gel sachets are the passive, “set and forget” option, this rechargeable unit is the active equivalent, and it earns its place for anyone storing gear in a genuinely damp environment — a garden shed, an unheated garage, or a cupboard under the stairs that always feels a bit clammy. It uses renewable silica gel crystals rather than a compressor, absorbing up to roughly 150ml of moisture over 20-30 days before it needs an 8-10 hour recharge via a standard plug socket, and a colour-changing window (orange to green) tells you when that point has arrived.
Here’s what the spec sheet won’t tell you, but reviewers note repeatedly: this isn’t designed to dehumidify an entire shed the way a compressor-based unit would, and treating it as one will lead to disappointment. Its real strength is targeted protection inside a specific storage box or small cupboard where your tent lives between trips, which is precisely the use case that matters for long-term storage. Owners of larger 1500ml compressor dehumidifiers report faster moisture extraction for whole-room damp problems, but at a real cost in noise, size and running expense that most tent owners simply don’t need for a seasonal storage box.
Pros:
- ✅ No batteries, cables or continuous power draw needed
- ✅ Compact enough to sit inside a storage box or cupboard
- ✅ Clear visual indicator shows when recharging is due
Cons:
- ❌ Limited capacity compared to compressor dehumidifiers
- ❌ Needs periodic recharging near a plug socket
At roughly £15-£25, it sits comfortably as a mid-range purchase, and the value case improves the damper your storage location naturally is — a bone-dry spare room barely needs it, but a brick outbuilding almost certainly does.
4. Wham Crystal 45L Stackable Plastic Storage Boxes (Set of 5) — the rigid backbone of a proper storage location guide
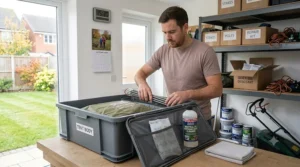
If there’s one product on this list that transforms tent storage from “hope for the best” into an actual system, it’s a set of rigid, lidded boxes. These Wham Crystal boxes are made in the UK from BPA-free polypropylene, each holding 45 litres internally (roughly 60 x 40 x 25cm), with clip-on lids that seal tightly enough to keep dust, insects and casual damp out, while still being stackable when full and nestable when empty for off-season storage of the boxes themselves.
Based on the spec comparison with soft storage bags or the tent’s original stuff sack, the practical benefit here is threefold: rodent resistance (mice make short work of a canvas or nylon stuff sack but generally can’t chew through polypropylene), crush protection when boxes get stacked in a loft or garage corner, and a sealed environment that makes silica gel or a mini dehumidifier far more effective, since they’re not fighting against a constant flow of fresh, humid air. Reviewers highlight the clear sides as genuinely useful for identifying contents without unstacking everything, which matters more than it sounds when you’re hunting for tent pegs in December.
Pros:
- ✅ Made in the UK from durable, BPA-free polypropylene
- ✅ Clip-on lids resist dust, insects and light moisture
- ✅ Stackable and nestable for efficient space use
Cons:
- ❌ Not fully airtight, so still needs a desiccant inside
- ❌ Bulkier than soft bags if storage space is tight
Expect to pay in the £30-£45 range for a set of five, and the value case is long-term: one set typically outlasts several tents, doubling as storage for decorations, tools or bedding once camping season ends each year.
5. Fabsil Universal Protector (2.5 Litre) — reproofing before storage, not just before your next trip
Waterproofing gets talked about as a pre-trip job, but it’s just as important — arguably more so — as a pre-storage job. Fabsil Universal Protector is a silicone-based, paint-on waterproofer that restores durable water repellency (DWR) to synthetic and canvas fabrics alike, with coverage varying by material: roughly 15-18m² per litre on lightweight nylon, dropping to 5-7m² per litre on medium-weight canvas, so a 2.5 litre tin comfortably handles most family tents with some left over for a porch or awning.
What most buyers overlook about tent and gear SolarProof-style products (Fabsil included) is that reapplying protector before storage, not just before a trip, keeps the fabric’s coating flexible over winter rather than letting it dry out and crack while folded. Reviewers who’ve used it for years on bell tents and awnings consistently describe water beading cleanly off the fabric for a full season after application, though several note the smell during application (a chemical, solvent-like odour that fades within a day or two) and recommend applying it outdoors in good ventilation. It’s best suited to owners of cotton canvas and poly-cotton tents, where UV and repeated wetting cycles do the most damage to the original factory coating.
Pros:
- ✅ Restores water repellency to canvas, poly-cotton and nylon
- ✅ Adds UV protection that slows fabric degradation
- ✅ 2.5L tin covers most family and bell tents
Cons:
- ❌ Strong solvent smell during and shortly after application
- ❌ Must be applied to a clean, dry-ish surface for best results
At around £20-£35 depending on size and retailer, this is a mid-range spend, but the ROI is significant: reproofing costs a fraction of replacing a tent whose coating has flaked and delaminated from being stored dry, cracked and unprotected for years on end.
6. Wet & Forget Mould, Lichen & Algae Remover (2 Litre) — treating the problem before it becomes permanent
Green streaks and black mould spots on canvas or flysheet fabric are the most common reason people give up on a tent entirely, assuming the staining is permanent. Often it isn’t. Wet & Forget is a bleach-free outdoor cleaner designed to be sprayed onto canvas, awnings and tents and left to work over days rather than scrubbed off immediately, using a residual formula that continues attacking regrowth after the initial application, which is a genuinely different approach from a scrub-and-rinse mould spray.
Here’s the honest trade-off reviewers and outdoor retailers flag repeatedly: because it’s designed to lift ingrained mould and algae, it also strips existing waterproofing from the fabric as part of the process, so reproofing with something like Fabsil afterwards isn’t optional — it’s part of the job. Reviewers describe strong results on porch awnings and tent canopies left up for a day or two after treatment, which matters because the “leave your tent up” instruction is one that campers with limited pitching space or shared gardens sometimes can’t accommodate, worth checking before you buy. It’s best suited to owners dealing with genuine green algae bloom or early mould rather than deeply set black mould stains, which may need mechanical scrubbing first regardless of the product used.
Pros:
- ✅ Bleach-free formula safer for coloured and delicate fabrics
- ✅ Residual effect slows regrowth after treatment
- ✅ Works on canvas, awnings and synthetic tent fabric alike
Cons:
- ❌ Strips waterproofing, requiring reproofing afterwards
- ❌ Needs the tent left up for a day or two for best results
Priced around £15-£25 for a 2 litre bottle, it’s a reasonable mid-range spend, and the value case is simple: a treated, stained tent that’s still structurally sound is worth far more than the cost of a bottle, especially against the cost of replacing it outright.
7. Spacesaver Jumbo Vacuum Storage Bags (6-Pack) — compression storage for tight lofts and small flats
For anyone storing a tent in a flat, a shared house, or a loft with genuinely limited headroom, rigid boxes aren’t always practical, and this is where vacuum compression earns its place. Spacesaver’s Jumbo bags (100 x 80cm) use a double-zip seal plus a triple-seal turbo valve designed to pull essentially all the air out using either a standard vacuum cleaner or the included hand pump, compressing bulky items by up to roughly 80% of their original volume.
Based on the spec comparison with a standard stuff sack, the real advantage here isn’t just space — it’s protection from moisture and odour while compressed, since a properly sealed vacuum bag keeps damp air and must out entirely, provided the tent going in was genuinely dry first. That last caveat matters enormously: reviewers and manufacturers alike are consistent that packing anything even slightly damp into a vacuum-sealed bag is a fast track to mildew, because you’ve created a sealed, humid micro-environment with nowhere for moisture to escape. It’s best suited to bulky synthetic tents rather than cotton canvas, which generally prefers to breathe rather than be compressed under vacuum pressure for months at a time.
Pros:
- ✅ Compresses bulky tents by up to 80% of their volume
- ✅ Reusable double-zip seal works with home vacuum cleaners
- ✅ Keeps contents protected from dust and surface moisture
Cons:
- ❌ Unsuitable for tents that aren’t completely bone dry
- ❌ Not ideal for cotton canvas, which needs to breathe
At roughly £20-£35 for a six-pack, this is a premium-leaning purchase relative to the others on this list, but for space-constrained storage it solves a problem none of the other products here can: sheer bulk.
Your Step-by-Step Tent Storage Setup Guide
Getting off season tent care right is less about any single product and more about sequencing. Skipping a step, or doing them out of order, is where most of the damage in this list actually starts. Here’s the routine worth following every single time a tent comes down for the season, based on the guidance the Camping and Caravanning Club gives its members and the practical experience of long-term canvas and nylon owners alike.
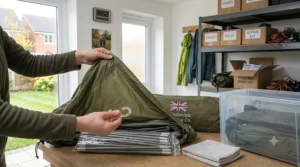
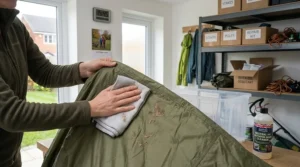
Start by pitching the tent fully, even if it’s just in the garden or a large room, rather than trying to dry it folded on a washing line. Damp corners and creases are exactly where fabric holds onto moisture longest, and a tent that looks dry on the outside can still be holding water in its seams. Once pitched, brush off any dried mud and give the fabric a wipe with a soft cloth and plain water — resist the urge to use household detergent, which strips the factory waterproofing far faster than normal wear does. Leave it up for a few hours in good airflow, ideally with a light breeze, and check the groundsheet and any taped seams particularly carefully, since these hold water longest and are the first place mildew tends to appear.
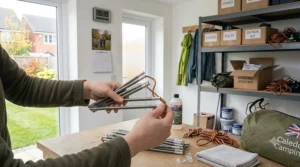
Once genuinely dry (not just dry-feeling — leave an extra hour if you’re unsure), treat any small tears with a repair tape and reproof the fabric if it’s been more than a season since the last treatment. Fold loosely rather than rolling tightly into the original stuff sack; tight folds along the same creases every year eventually crack waterproof coatings, particularly on polyurethane-backed flysheets. Pack poles partially assembled or loosely bundled to reduce tension on the internal shock cord, and store pegs separately in a labelled bag so a common mistake — misplacing half your pegs — doesn’t ruin next year’s first trip. Finally, add your chosen desiccant, place everything into a rigid box or breathable bag, and store it somewhere with stable temperature and low humidity, which brings us neatly to where, exactly, that should be.
Real-World Storage Scenarios: Which Setup Suits You?
Different living situations call for genuinely different approaches, and matching your setup to your actual circumstances beats buying every product on this list regardless of need.
The festival regular in a shared house: Space is the constraint here, not budget. A Spacesaver vacuum bag compressed down to a fraction of its original bulk fits under a bed or on top of a wardrobe far more easily than a 45L box ever could, and since these tents get used every few weeks rather than sitting for a year, moisture control matters less than sheer footprint. Pair the vacuum bag with a few silica sachets tucked inside before sealing, and skip the dehumidifier entirely — it’s overkill for a tent that’s rarely stored more than a month at a time.
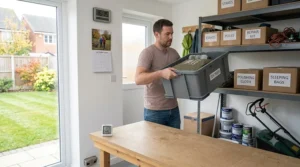
The family with a garden shed: Here, space is less of an issue than humidity, since sheds run damper than living spaces almost year-round in the UK. A Wham Crystal box set, reproofed fabric via Fabsil, and a cordless mini dehumidifier tucked inside the box is the combination that earns its keep, particularly for larger dome or tunnel tents that don’t compress well anyway. Budget around £70-£90 total for the full kit, spread across a few purchases, and expect it to last multiple tents and many seasons.
The bell tent or canvas owner: Canvas behaves differently to synthetic fabric — it needs to breathe, resents being vacuum-compressed, and is far more prone to mould if stored even slightly damp. For this group, the priority order flips: mould treatment and reproofing (Wet & Forget followed by Fabsil) matter more than the storage container itself, and a breathable cotton or mesh bag, not a sealed plastic box or vacuum bag, is the right call for the canvas itself, with silica sachets reserved for accessories like poles and pegs stored separately.
Common Tent Storage Problems and How to Fix Them
Problem: The tent smells musty even though it looked dry when packed away. This is almost always a case of the fabric feeling surface-dry while retaining moisture in the weave itself. The fix is prevention rather than cure at this point — re-pitch it, let it dry for a full day next time, and consider a moisture meter or simply extending drying time by several hours beyond when it “feels” done.
Problem: Green or black staining has appeared on the flysheet. This is mould or algae, not dirt, and scrubbing with household cleaner often makes it worse by damaging the waterproof coating. A dedicated product like Wet & Forget, applied and left according to instructions, followed by reproofing, is the more reliable route than DIY bleach solutions, which can bleach and weaken canvas.
Problem: Zips have seized or become stiff after storage. This is usually down to dust and grit trapped during the last pack-down rather than the storage method itself. A dry silicone lubricant or, in a pinch, a rubbed candle stub along the teeth, combined with gently working the zip back and forth, resolves most cases without needing replacement.
Problem: The tent takes up too much storage space. Compression is the answer, but only for genuinely dry synthetic tents — a vacuum bag is the tool here, not a smaller stuff sack, which just concentrates the same bulk into a harder-to-pack shape without saving real volume.
Problem: Mice or insects have got into the storage bag over winter. Soft fabric bags offer no resistance to rodents at all. Switching to a rigid, lidded polypropylene box solves this specific problem more reliably than any spray or repellent, since it removes the physical access point entirely.
How to Choose the Right Tent Storage Method
What is tent storage, in the context of long-term care? Tent storage refers to the combined process of cleaning, drying, treating and containing a tent between uses, specifically aimed at preventing moisture damage, mould growth and material degradation over weeks or months of inactivity.
Getting this right comes down to working through a short, logical sequence rather than guessing:
- Assess your tent’s fabric type first. Cotton canvas and synthetic nylon or polyester behave completely differently in storage, and treating them the same way is the single biggest cause of avoidable damage.
- Check your available space realistically. A loft with headroom favours rigid boxes; a shared flat or small car boot favours compression bags — don’t fight your storage space with the wrong product.
- Consider your storage location’s humidity, not just its size. A dry spare room needs far less active moisture control than a garden shed or unheated garage, so match desiccant strength to the environment.
- Factor in how often the tent actually gets used. Frequent use (every few weeks) tolerates faster, simpler storage; long dormancy (a full off-season) rewards a fuller routine including reproofing.
- Budget for the whole system, not one product. A £40 storage box with no desiccant and no reproofing is only solving one-third of the problem — spread your spend across cleaning, protecting and containing.
- Prioritise pest resistance if storing in outbuildings. Sheds and garages are where rodent damage happens most often, making a rigid, sealed container worth the extra cost over a soft bag.
- Plan for a mid-storage check. Especially over a long winter, a five-minute check partway through the off-season catches emerging damp or pest problems before they become expensive.
Common Mistakes When Storing a Tent Long Term
The single most common mistake, repeated across camping forums and retailer advice pages alike, is packing a tent away while it’s still even slightly damp — a mistake that the University of Exeter’s research into mould growth conditions helps explain, since sustained relative humidity above roughly 70-80% inside an enclosed space is genuinely all mould needs to establish itself, and a sealed tent bag creates exactly that environment if the fabric wasn’t fully dry going in.
A close second is using the original stuff sack for long-term storage rather than short trips. These sacks are designed for compact transport, not months of storage, and the tight compression they force actually works against fabric longevity by creasing waterproof coatings along the same lines repeatedly. Third is neglecting the poles and pegs entirely — aluminium poles can develop corrosion if stored wet or in contact with damp canvas, and lost pegs are one of the most common reasons a otherwise-good tent doesn’t get used the following season, simply through frustration at the faff of replacing them. Finally, many people store tents in fluctuating environments — think a garage that swings from freezing to warm and back — without accounting for the condensation that temperature swings cause inside sealed containers; a stable, moderate location beats an extreme one every time, even if the extreme location is technically drier on average.

Fold vs Stuff: Which Tent Storage Method Wins?
This is one of the more genuinely contested questions in tent care, and the honest answer is: it depends on what you’re storing for. Stuffing — pushing the tent randomly into its bag without deliberate folds — is actually the preferred method for short-term storage between trips, because it avoids creasing the same lines repeatedly, which over years can weaken waterproof coatings at consistent stress points. For long-term, off-season storage, however, loose folding tends to win out, provided the folds aren’t tight and aren’t repeated in exactly the same place every single time.
The nuance most buying guides skip is that this isn’t really “fold vs stuff” as a binary choice — it’s about avoiding repetition more than choosing a specific technique. A tent that’s folded slightly differently each time, or occasionally stuffed instead of folded, distributes wear more evenly across the fabric than a rigid, identical folding routine repeated for a decade. For canvas and cotton-blend tents specifically, loose folding combined with genuine breathing room in a mesh or cotton bag consistently outperforms stuffing, since canvas holds creases and moisture differently to synthetic fabric. For lightweight synthetic backpacking tents, stuffing loosely into a larger-than-included bag, rather than the tight stock stuff sack, tends to be the better long-term call.
Tent Storage for Different Types of Campers
Beginners and occasional campers benefit most from simplicity: a single rigid storage box, a handful of silica sachets, and the basic drying-before-storage routine covers the vast majority of storage risk without needing to learn about reproofing schedules or humidity percentages.
Frequent weekend and festival campers should prioritise speed and space-efficiency over exhaustive protection, since their tents rarely sit dormant long enough for slow-developing problems like coating degradation to become serious — a vacuum bag and a quick pre-pack check each time serves this group well.
Families with larger tents face the biggest storage footprint and the most components (multiple poles, room dividers, porch extensions), making a labelled, multi-box system genuinely worthwhile, alongside an annual reproofing cycle since larger tents see more cumulative UV exposure per trip.
Bell tent and canvas enthusiasts, often running higher-value equipment, benefit most from investing in the reproofing and mould-prevention side of the equation specifically, since canvas is both more expensive to replace and more forgiving of good care, often lasting decades when properly maintained.
Storage Location Guide: Loft, Shed, Garage or Spare Room?
Where you store matters just as much as what you store it in, and this is where UK housing stock creates some genuinely tricky trade-offs. Lofts offer good space and are usually dry, but temperature swings dramatically between seasons, which can drive condensation cycles inside sealed containers — a real risk the Government’s official guidance on damp and mould health risks makes clear extends beyond property damage into genuine health concerns for anyone regularly handling mould-affected fabric.
Sheds are convenient but almost always the most humid of the four options, particularly wooden sheds without a damp-proof membrane, making active moisture control (the cordless dehumidifier from earlier) far more valuable here than in any other location. Garages sit somewhere in between — generally drier than a shed but subject to the same temperature swings as a loft, and often home to road salt, oil residue and general clutter that’s worth keeping well away from tent fabric. Spare rooms and airing cupboards are, honestly, the gold standard if you have the space: stable temperature, low humidity, and no pest access, though few UK homes have room to spare for camping gear indoors year-round.
If a shed or garage is your only realistic option, treating desiccant and dehumidifier use as non-negotiable rather than optional becomes far more important, since these environments are exactly where the sustained damp conditions linked to respiratory problems — as described on the NHS page covering aspergillosis and mould exposure — are most likely to develop inside stored fabric over a full season.
Long-Term Cost & Maintenance: Is Proper Storage Worth It?
It’s worth being blunt about the maths here, because “buying more storage products” can feel like an unnecessary expense until you compare it against replacement cost.
| Approach | Upfront Cost | Typical Tent Lifespan | Cost Per Year (approx.) |
|---|---|---|---|
| No storage system (bag in a damp shed) | £0 | 2-4 seasons | Full replacement cost ÷ 2-4 |
| Basic system (box + silica gel) | £40-£55 | 5-8 seasons | Significantly lower per season |
| Full system (box, dehumidifier, reproofing, mould treatment) | £90-£140 | 8-15+ seasons | Lowest cost per season overall |
Reading the table, the pattern is clear: a full storage system roughly doubles or triples the upfront spend compared with doing nothing, but more than doubles or triples the usable lifespan of the tent in return, which means the actual cost per camping season drops rather than rises. A mid-range family tent costing £150-£300 that lasts fifteen seasons instead of three represents a genuinely significant saving once you do the arithmetic, and that’s before accounting for the sunk cost of accessories, footprints and porch extensions that get replaced alongside a failed tent. Maintenance-wise, budgeting an annual hour — cleaning, a fresh check of waterproofing, swapping silica sachets — is realistically all a synthetic tent needs, while canvas tents benefit from a slightly more involved annual reproofing check given their higher replacement cost and different failure modes.
FAQ
❓ How long can a tent be stored before it needs re-proofing?
❓ Can I store a tent in a loft without a storage box?
❓ Is it bad to compress a tent in a vacuum bag for months?
❓ How do I know if my tent has mould or just dirt?
❓ Do cotton canvas tents need different storage to nylon tents?
Conclusion
Storing a tent properly isn’t complicated, but it does need to be deliberate. The pattern across every product and every scenario in this guide comes back to the same three principles: make sure it’s genuinely dry before it’s packed away, control the humidity of wherever it’s stored, and protect the fabric itself with a repair and reproofing routine rather than waiting for problems to appear. None of the seven products covered here are essential in isolation — you could build a perfectly good storage routine from just a rigid box and some silica gel sachets — but understanding which combination suits your specific tent, space and storage location is what actually prevents the disappointing unzip-and-recoil moment next spring.
A little routine goes further than any single product purchase. Ten minutes spent drying a tent properly before it goes away saves hours of scrubbing mould next year, and the modest cost of a desiccant or a rigid box is genuinely small change against the cost of a full tent replacement. Build the habit once, and it becomes second nature by the second or third camping season, freeing you up to actually think about where you’re pitching next rather than what state the tent will be in when you get there.
Recommended for You
- Camping Mallet Buying Guide 2026: 7 Top Picks That Work
- Electric vs Manual Tent Pump 2026: 7 Real Pumps Ranked & Compared
- Rechargeable Tent Light: 7 Best Picks for UK Camping in 2026
Disclaimer: This article contains affiliate links. As an Amazon Associate, I earn from qualifying purchases. If you purchase products through these links, we may earn a small commission at no additional cost to you.
✨ Found this helpful? Share it with your friends! 💬🤗
